
今回は、PySimpleGUIを使って、自作のPythonプログラムを起動するランチャソフトを作ります。公式クックブックにデモが載っています。
この記事に載っているサンプルコードをコピーして、Pythonで実行すれば、簡単に動きを確認できますので、是非試してみて下さい。
この記事では、初心者にもわかりやすいように、各処理の内容を、サンプルコード内にコメントとして載せています。
PySimpleGUIのインストールの仕方は、以下の記事で紹介しています。
自作Pythonプログラムを起動するランチャアプリ
このアプリは、自作のPythonプログラムを選択して、起動できます。
サンプルコード
# https://github.com/PySimpleGUI/PySimpleGUI/blob/master/DemoPrograms/Demo_Desktop_Floating_Toolbar.py

#!usr/bin/env python
# -*- coding: utf-8 -*-

import sys
import PySimpleGUI as sg
import subprocess
import os


"""
    Demo_Toolbar-クイックランチャー付きのフローティングツールバー
    ボタンがクリックされたときに起動するように特定のプログラムを設定するか、
    コンボボックスを使用して、ルートフォルダーにある.pyファイルを選択し、そのファイルを実行します。
"""

ROOT_PATH = './'

# ランチャー関数
def Launcher():

    sg.theme('Dark')

    # rootパスにあるpyファイルをすべて抽出する
    namesonly = [f for f in os.listdir(ROOT_PATH) if f.endswith('.py')]

    # pyファイルがなかったら
    if len(namesonly) == 0:
        namesonly = ['test 1', 'test 2', 'test 3']

    sg.set_options(element_padding=(0, 0),
        button_element_size=(12, 1), auto_size_buttons=False)

    # レイアウト(1行目:コンボ、RUNボタン、プログラム1ボタン、プログラム2ボタン、プログラム3ボタン、EXITボタン、2行目:テキスト)
    layout = [[sg.Combo(values=namesonly, size=(35, 30), key='demofile'),
               sg.Button('Run', button_color=('white', '#00168B')),
               sg.Button('Program 1'),
               sg.Button('Program 2'),
               sg.Button('Program 3', button_color=('white', '#35008B')),
               sg.Button('EXIT', button_color=('white', 'firebrick3'))],
              [sg.Text('', text_color='white', size=(50, 1), key='output')]]

    # ウィンドウの生成
    window = sg.Window('Floating Toolbar',
                       layout,
                       no_titlebar=True,
                       grab_anywhere=True,
                       keep_on_top=True)

    # 無限ループ
    while True:

        # イベント取得
        event, values = window.read()

        # EXITボタン押下、もしくは×押下時
        if event == 'EXIT' or event == sg.WIN_CLOSED:
            break           # exit button clicked

        # Program1ボタン押下時
        if event == 'Program 1':
            print('Run your program 1 here!')

        # Program2ボタン押下時
        elif event == 'Program 2':
            print('Run your program 2 here!')

        # Runボタン押下時
        elif event == 'Run':

            # コンボで指定したファイルを実行
            file = values['demofile']
            print('Launching %s' % file)
            ExecuteCommandSubprocess('python', os.path.join(ROOT_PATH, file))

        else:
            print(event)

    window.close()

# ファイル実行関数
def ExecuteCommandSubprocess(command, *args, wait=True):
    try:

        # OSがLinuxの場合
        if sys.platform == 'linux':
            arg_string = ''
            arg_string = ' '.join([str(arg) for arg in args])
            # for arg in args:
            #     arg_string += ' ' + str(arg)
            print('python3 ' + arg_string)
            sp = subprocess.Popen(['python3 ', arg_string],
                                  shell=True,
                                  stdout=subprocess.PIPE,
                                  stderr=subprocess.PIPE)

        # OSがLinux以外の場合
        else:
            arg_string = ' '.join([str(arg) for arg in args])
            sp = subprocess.Popen([command, arg_string], shell=True, stdout=subprocess.PIPE, stderr=subprocess.PIPE)

    except:
        pass

# メイン関数
if __name__ == '__main__':
    Launcher()
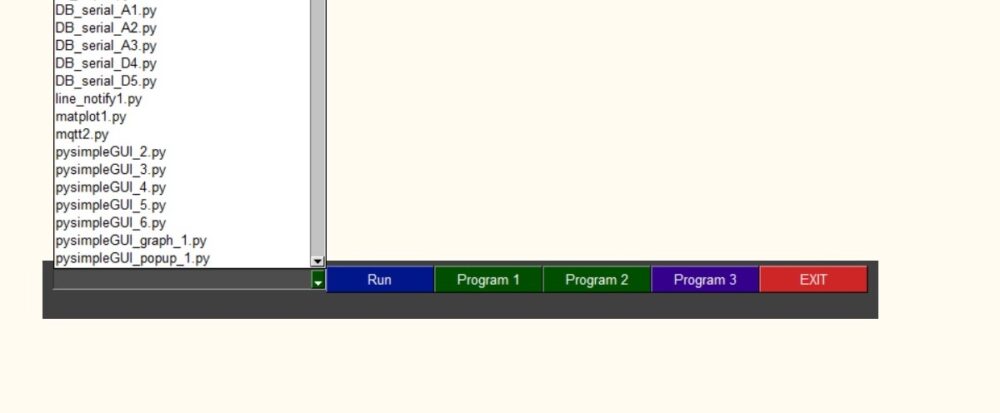
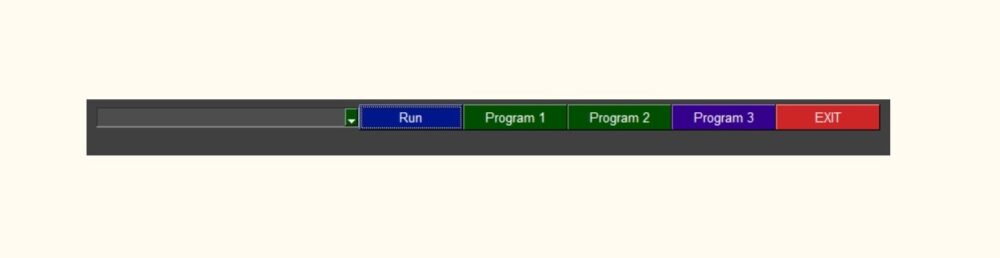
実行すると、下図のようなウィンドウが立ち上がります。
左側をクリックすると、リストが出てきますので、起動したいPyファイルを選択します。
選択後に、RUNボタンを押すと、Pythonプログラムが起動されます。
まとめ
今回は、Pythonライブラリである、PySimpleGUIを使い、自作のPythonプログラムを起動するランチャアプリの作り方を紹介しました。
Pythonでプログラムを作るのなら、ラズパイが安くて、環境構築も楽で、おすすめです。
Raspberry Pi は、Raspberry Pi Foundationによって開発された低価格で小型のシングルボードコンピュータです。最初は教育目的で2012年にリリースされましたが、その手頃な価格と高性能により、教育用にとどまらず、さまざまなプロジェクトやプロトタイピングのプラットフォームとして広く利用されています。Raspberry Piは、LinuxベースのOSを主に使用し、簡単にカスタマイズ可能であるため、プログラミングやエレクトロニクスの教育、IoTデバイス、ホームオートメーション、メディアセンターなどに活用されています。
AI(人工知能)特化型プログラミングスクール「Aidemy Premium」
Aidemy Premiumは、AIや機械学習などの最先端技術の修得に留まらず、それらを活用して目標達成を実現するまでを一気通貫して支援するオンラインコーチングサービスです。
こんな思いを持っている人にオススメ
・AIエンジニア/データサイエンティストにキャリアチェンジしたい
・業務課題(研究課題)をAIを使って解決したい
・教養としてAIについて知りたい
・AIに関してのスキルを身に着け就職活動に活かしたい…
オススメポイント
・3ヶ月間集中して「AIプログラミング」を修得するオンラインコーチングサービスです。
・完全なプログラミング初心者から研究者にまで幅広く優良なコンテンツを提供します。
・通常のプログラミングスクールとは異なり、受講者の進捗管理を徹底して行います。
・専属メンターがAIの学び方から徹底的にコーチングします。
・完全オンライン完結なので、東京以外に在住・在勤の方も気兼ねなくお申込み頂けます。
実績
・日本最大級のAI/人工知能プログラミングスクール
・SaaS型AI学習サービス「Aidemy」会員登録者数 55,000名突破
・法人向けAI内製化支援サービス「Aidemy Business」導入企業数 120社突破
・第16回 日本e-Learning大賞「AI・人工知能特別部門賞」受賞
・「HRアワード2019」プロフェッショナル部門 入賞
無料ビデオカウンセリング実施中です。


コメント